Contents
B22 Embedded HTTP Server
This describes the LIDAR's web based interface running on its internal HTTP Server.
1. Purpose
Embedded HTTP server enables convenient configuration, control and monitoring of LIDAR hardware over network, regardless of computing platform used, utilizing standard web browser.
2. Introduction to HTTP server provided web pages
2.1. Login Page
To access embedded web, connect your computer to the same network as LIDAR. Open web browser of your choice and enter in the address field the IP address of corresponding LIDAR to which you have legitimate rights for operation. To have authorized access, a user name and password must be provided. Illustrative Figure 1 below shows login window.
Figure 1

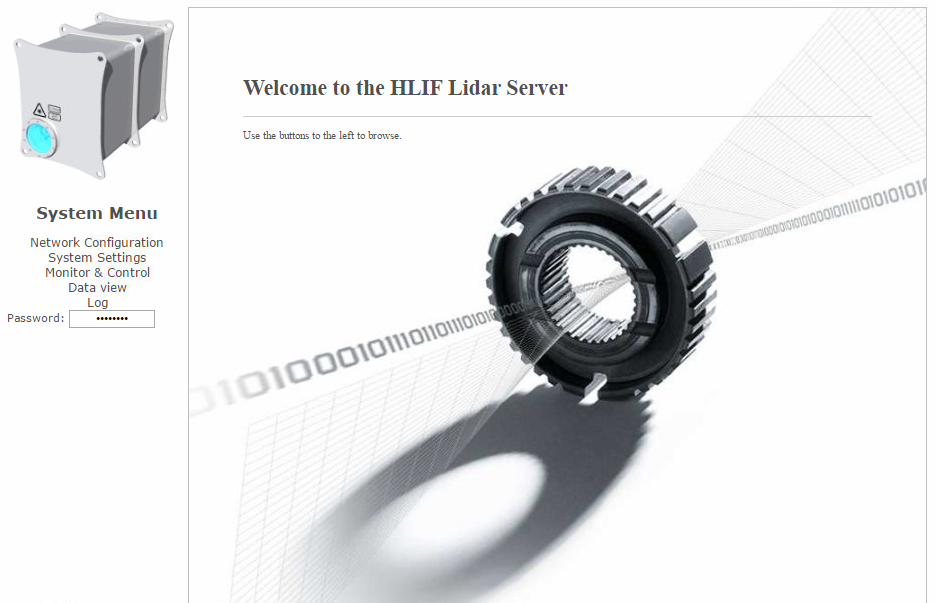
2.2. Opening Page
Opening page looks similar to picture on Figure 2. Below we'll walk through System Menu.
Figure 2
2.3. Network Configuration
You get the idea of what fields and network parameters can be altered on Figure 3. You should manipulate these parameters only if you are confident what are you going to do! You may loose connection to the device if wrong parameters are entered.
Figure 3

2.4. System Settings
If System Settings menu is selected in System Menu, You'll see page like Figure 4. (Image of page continues on figure 5.) This is very important place where most operational values can be altered and user intervention is regularly needed.
Figure 4
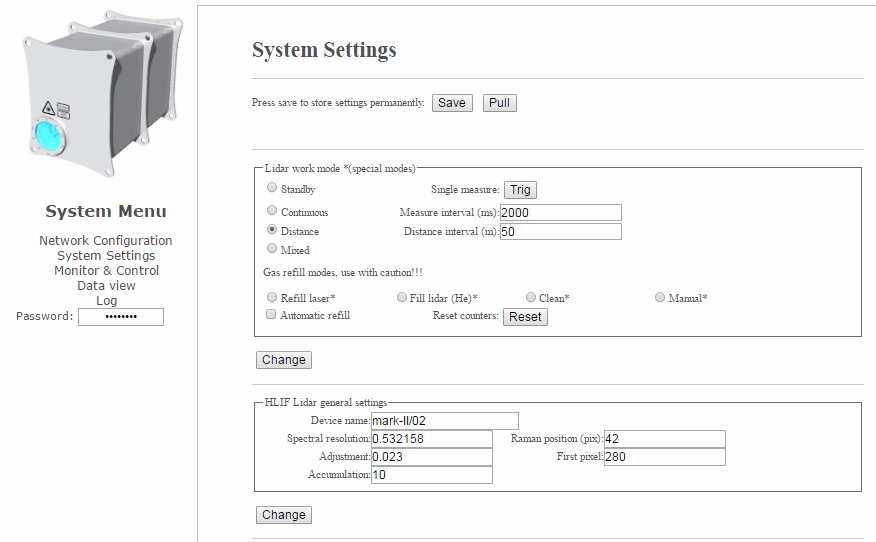
“Lidar Work mode” box serves for:
- Standby – all LIDAR systems may be ready, but no sampling is executed. This mode is useful for temporary pausing sampling and laser radiation.
- Continuous – sampling rate is determined by specified measuring interval in milliseconds.
- Distance – sampling is performed in equal distances covered by vessel and calculated by position data from GPS.
- Mixed – logical OR function decides if measuring interval or covered distance triggers next sample.
- Gas refill modes – These are covered in special Gas Refill Manual and need extra caution! BE CAREFUL!
“HLIF Lidar general settings” box combines several figures that present LIDAR optical characteristics. Thou, Accumulation count can be altered with little risk. Increasing it, in principle, improves Signal to Noise (S/N) ratio. We recommend to leave it to 10 pulses per sample. Do not try to alter other figures in this box.
Figure 5
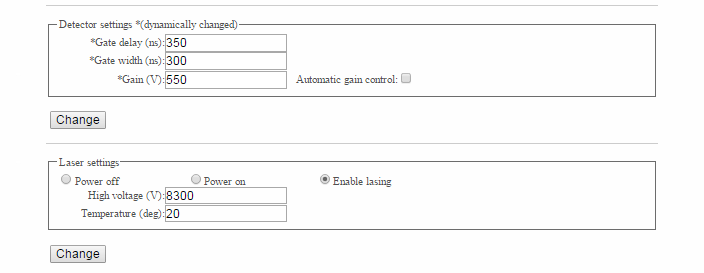
“Detector settings” box shows optimal gate delay, width and gain set for your installation. They depend on distance, distance variation and signal level respectively. Handle with care!
“Laser Settings” box includes controls for powering on/off laser separately from other LIDAR unit electronics and enabling/disabling lasing.
2.5. Monitor & Control
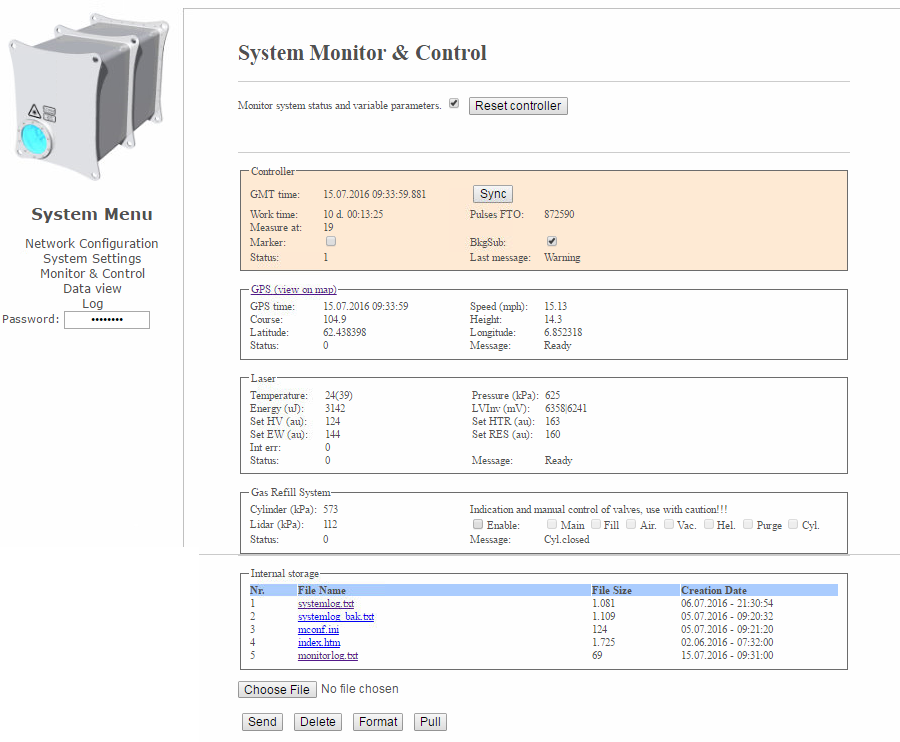
This page, as shown on Figure 6, combines all real time parameters you need to follow and take actions accordingly from time to time.
“Controller” box shows controller GMT synchronized clock, that can be manually synced if there is need. Laser pulse and time counters since last gas refill must be checked regularly. Read Gas Refill Manual for that matter.
“GPS” box contents are self explanatory.
“Laser” box contents show:
- Temperature - Laser Temperature must be below 45(50), figure in brackets shows controller temperature.
- Pressure – in laser chamber must be 600-700 kPa
- Energy – pulse energy must not drop below 1500 micro Joule. Then gas refill is necessary.
Other values make importance, if LIDAR malfunctions.
“Gas Refill System” box displays statuses of several valves and includes some controls for manual intervention in gas refill procedures.
CAUTION! Do not attempt to gas refill or other gas manipulation prior to getting familiar with Gas Refill Manual. Severe damage may happen to LIDAR hardware.
“Internal storage” box includes hyperlinks to plain text log and ini files.
Figure 6
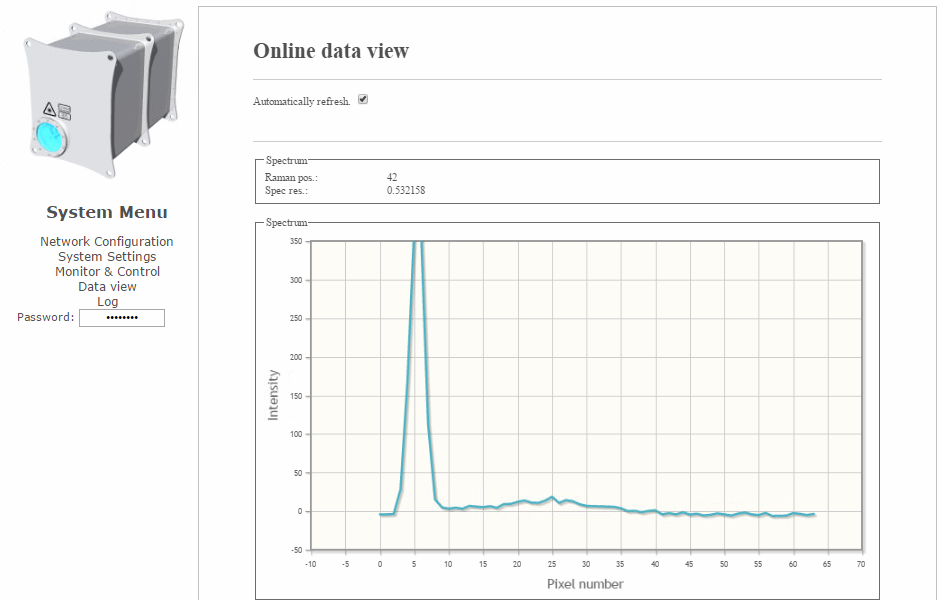
2.6. Data View
Data view page enables to monitor last measured sample spectrum. It is good to have visual control over signal quality and features. See screenshot in Figure 7. Read Gas Refill Manual for that matter.
Figure 7
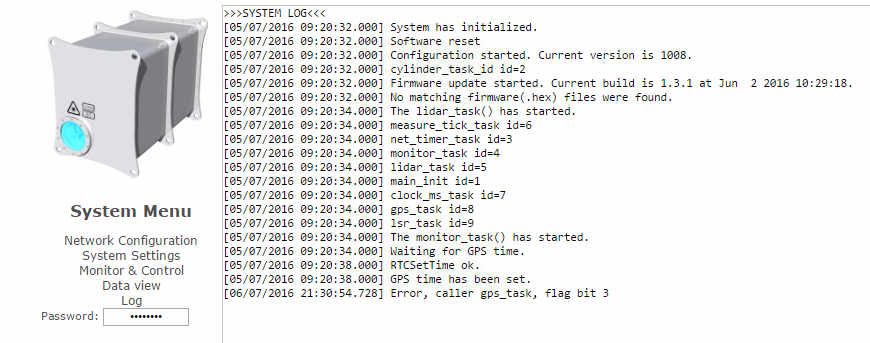
2.7. Log
Log menu (Figure 8.) opens system log text file. It can be copied and sent over to support person, for troubleshooting in case problems arise.
Figure 8
Attachments (8)
- 02-lidar-http-welcome.png (287.8 KB) - added by oliver 10 years ago.
- 03-lidar-http-network.png (76.3 KB) - added by oliver 10 years ago.
- 04-lidar-http-system-settings.png (80.8 KB) - added by oliver 10 years ago.
- 05-lidar-http-system-settings.png (21.0 KB) - added by oliver 10 years ago.
- 06-lidar-http-system-monitor.png (140.2 KB) - added by oliver 10 years ago.
- 07-lidar-http-online-data.png (82.8 KB) - added by oliver 10 years ago.
- 08-lidar-http-log.png (145.6 KB) - added by oliver 10 years ago.
- 01-lidar-http-login.png (68.7 KB) - added by oliver 10 years ago.
Download all attachments as: .zip